
|
Low-Cost, Sturdy Shelving
|
Part II: Joinery
Over three decades ago I walked into a used bookstore in the historic district of a Midwestern town and beheld an extraordinary array of bookcases that shelved what had to be over 100,000 books.
I wasn't there to buy books; I'd been called to the scene by the proprietor, who needed even more bookcases. A friend of hers had built the original units but was no longer available, she
explained, and, after leading me up to one of them, then asked, "Can you build me something to match this?"
"I can," I said, "but I won't."
I didn't say so at the time, but this friend of hers had done her no favor. The bookcases were constructed out of three quarter inch 1 x 10 pine boards - fine as far as it went - but the shelves had been
attached to the sides simply by hammering nails in from the sides. Perhaps some backing would've helped strengthen things, but as it was, it was scary. I explained to her that the only things
keeping these bookcases in place were gravity and the "support" from adjoining bookcases, and there was at least a possibility that an entire wall of them could come down if one were to
give a push at either end of a row. Also, the situation would only worsen over time.
The first bookcase I recall making - I think I was nine or so - was constructed exactly like these bookcases, so I do understand that there's something intuitive in the approach, also some
precedence. Framers, for example, hammer nails into end grain all day long, but it isn't an issue because some sort of siding, sheathing, wall board, etc., is nailed onto each side of a frame
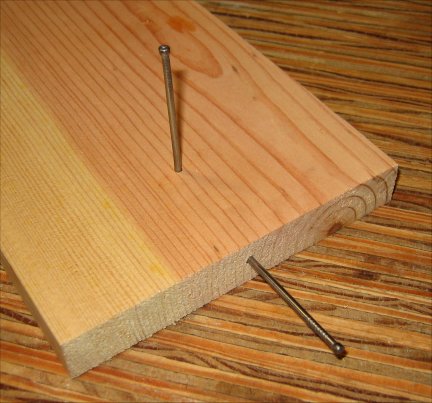
to give it strength. The problem with free-standing bookcases is that it violates a first principle of woodworking. This can be readily visualized with a photograph:
The nail on the right has been hammered into end grain. With a little effort I could pull it out with my bare hand. Why? Because the fibers of the wood run parallel to the nail; the
nail is merely wedged between the fibers and there's little resistance offered when removing it. The nail on the left, however, has been driven in perpendicular to the grain and would
likely require a tool to remove because fibers were broken as it was pounded in and the resulting internal splintering offers significant resistance when the nail is pulled in the opposite
direction, sort of like a Chinese finger trap - easy to push your fingers into, difficult to get them back out. Use a screw instead of a nail, and the resistance is exceptional.
Plywood presents a somewhat different issue. It's comprised of criss-crossing layers of wood - about half of it end grain, half side grain. Pound a nail into its "end" grain, and it
might or might not enter into a side grain layer, and it might well split two layers apart. Generally, the result will be only marginally better - worse when it splits a layer. And MDF
or particle board? Worse yet.
There are, literally, dozens of woodworking techniques to overcome this end-grain issue in perpendicular joints but few that are elegant enough to accomplish without more advanced skills,
expensive tools or both - well, with one notable exception: pocket hole joinery.
Pocket holes, for the purpose of building bookcases, are holes drilled not into the sides but at an acute angle into the shelves so that a screw can be driven perpendicularly into the
grain of the sides:
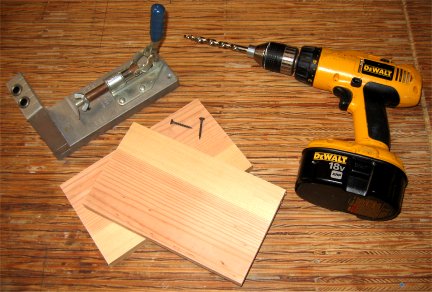
The beauty of this system is that quickly produces an exceptionally strong and durable joint that requires next to no stock preparation other than cutting side and shelf members to length - i.e., you cut the pieces to length, drill some holes and screw the shelves into place. The process is
lightning fast. If you have some sort of saw to make the cuts (or have them cut at your home improvement center) and a power drill, there's only one other gadget you'll need - a Kreg jig:
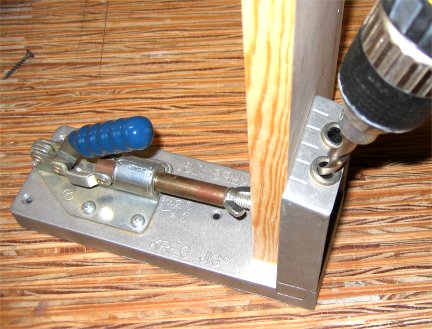
The shelves are clamped into it like this:
Kreg jigs are typically bundled with a special tapered step drill bit - something you can't do without. Also, these jigs come in all shapes and sizes now, from exceptionally simple and
low-cost Harry Handyman models to full-blown production units, sometimes with multiple accessories. You should be able to get something acceptable for under $50, especially if you look for one used
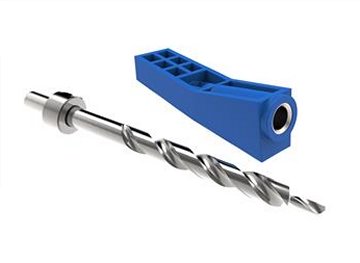
on eBay. Do take care to purchase one with an integrated clamp (like the one pictured above). Some of the simpler models require the use of a separate clamp - and believe me, they aren't
much fun to mess with. Example:
Various models can be viewed here.
Also, special (expensive!) pocket hole screws are manufactured specifically for this purpose, but don't waste your money. If you're using three quarter inch stock, one and one quarter inch
drywall screws work great, and they're dirt cheap.
In Part III of this series I'll discuss design considerations.
< to previous article
to previous feature article >
Forum
| Store
| BookLinks
| BookSearch
| BookTopics
| Archives
Copyright 2003-2016 by BookThink LLC
site by

Questions or comments?
Contact the editor, Craig Stark
editor@bookthink.com
Privacy Policy & Disclaimer
Advertise
| AboutUs
| ContactUs
| Search Site
| BookShelf
| BookThinker