|
Replacing Booklet Staples
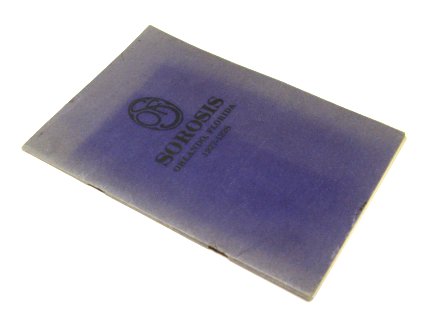
Here's a problem child all of us know:
The staples have rusted, degrading the paper under them, and the center leaf has pulled away, leaving holes in the leaf that cannot be re-stapled as is.
There's obviously a need to restore this booklet's function, but how one goes about this will depend on how much interest there is in restoring its appearance as well. If
you're a librarian, perhaps stapling it in different locations with a deep-throated stapler will be a good - and quick - fix. If you're a bookseller, however, with an interest
in maximizing a collectible booklet's outcome, replacing the staples in the original location would be the better approach, especially since the rusted staples need to come
out to prevent further damage.
Since I'm a bookseller, I'll demonstrate the latter - and, since this is a hack, not a conservation project, the quicker the hack the better.
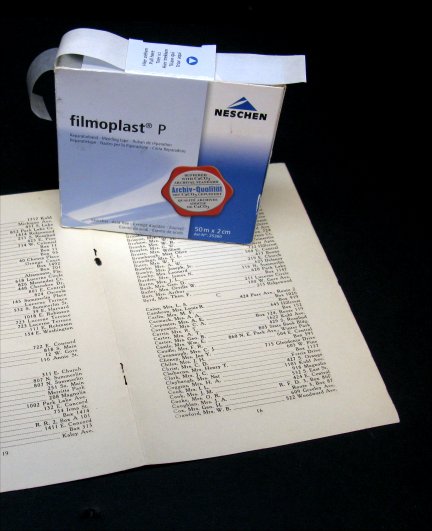
If you're not familiar with this product, this is a good time to introduce you to it:
Neschen Filmoplast is a superb mending tape, and though not cheap as tape goes, one roll should last you years. First and foremost, it's archival, so several years down
the road you won't see the familiar amber stain with peeling cellophane so often encountered with conventional scotch tape. Moreover, it's strong, thin and has a satin finish.
Once applied to a tear, for example, and burnished with a bone folder, it becomes near invisible.
For our booklet leaf, two 3/4" x 1/8" strips will more than cover the holes left by the staples and provide a base for re-stapling it. It's best to apply the tape to the leaf
verso; the staple legs, once bent into place, will then cover any exposed adhesive on the recto. If the original hole locations are still clearly evident, it's a simple matter to
use a bookbinding awl to punch holes through the filmoplast. If not, a staple or strip of staples can be used as a template.
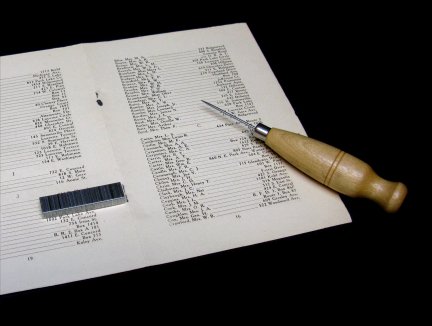
Note that most staple sizes are standard going back many decades; in most cases you need only be concerned with matching up the length of the staple legs - in this case 1/4".
Also, though not cheap either, rustproof staples are a better choice.
Remove one of the rusted staples only. The other will keep the booklet leaves aligned as the new staple is fed through the existing holes. I use a micro spatula for
this. It's thin enough to readily work under the legs of the staples, and its edges are slightly rounded so as not to dig into the paper.
The awl is also a good tool for separating a staple from the strip, and it's usually the work of a few moments to feed the new staple through the holes. If you have difficulty
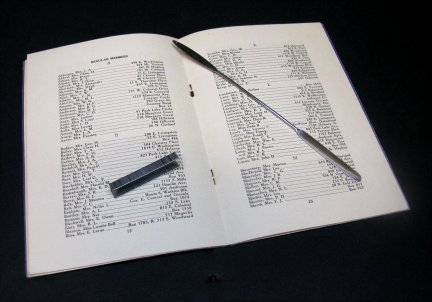
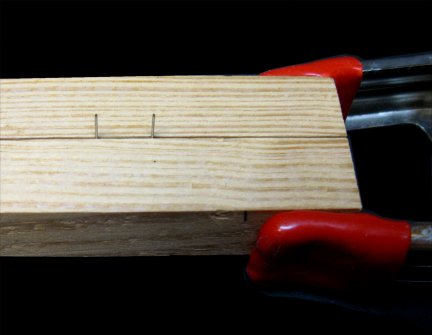
holding the staple steady or keeping it at the necessary angle, a simple jig will make your life easier:
Holding one leg at a 90-degree angle to the booklet - needle nosed pliers will keep things more accurately aligned - slowly bend the other leg down with the blade of the
micro spatula to meet the center fold. Press down firmly to make it snug. Next, press the bent leg of the staple against the table top - with pliers or whatever - and slowly
bend and press the other leg down, taking care to align it with the other leg. The new staple will now keep the leaves aligned as you remove the other staple.
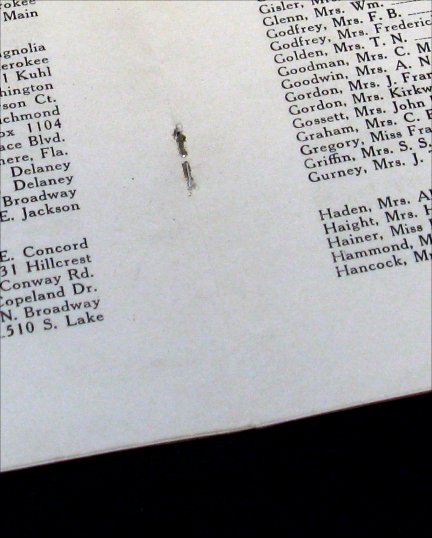
The finished repair:
This method can also be used to repair another common issue - staples that have pulled through a booklet cover.
Oh - and if you aren't thrilled with the faded areas on the front panel of my nifty purple booklet, why, there's a hack for that, too. Look for it soon!
< to previous article
to previous feature article >
Forum
| Store
| BookLinks
| BookSearch
| BookTopics
| Archives
Copyright 2003-2015 by BookThink LLC
site by
|

|
|