You may have noticed that many library books have strips of tape at this juncture which mend the tear and hold the book together. This is functional and may even be archivally sound if the repair was made with Tyvek or rice paper, but it may not be very aesthetic, especially when you're dealing with a book you want to be able to sell. In that case, replacing the endleaves altogether is a better choice, unless - as we discussed in my last article - the original endleaves contribute to the provenance of the book.
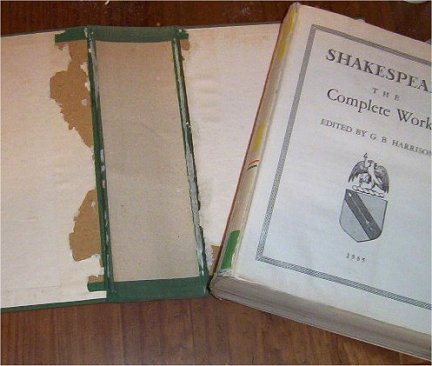
The example used for this article is a collection of Shakespeare's works, nicely illustrated, not a terribly expensive book but good enough. It was shipped in very good condition inside and out. Somewhere en route it was mugged (buyer remorse?) and returned to me in shocking condition: The dust jacket was badly torn, the spine was split in half, and it was completely out of its case. At least it served well in preparing this article, and it is once again in salable condition.
I would suggest practicing these techniques on a book of low value, perhaps one that you would otherwise discard or purchased from the bargain bin as a test case. This repair is not difficult, but it does require accuracy, precision, and a light hand with the glue. Please see my earlier BookThink article,
"The Basics," for a review of the tools needed. You will require the following materials:
- Bone folder
- PVA glue & foam brush
- Wax paper
- Waste paper
- Replacement endpapers
- Rice paper (optional)
- Ruler
- Scalpel or small box cutter
- 2 knitting needles, size #3 or #4
- A weight, such as a covered brick
Most books do not have especially fancy endleaves. Modern books usually have plain white ones, while older books generally have cream. Such papers can be bought, already folded and ready to go into your books, from many library supply houses, such as Gaylord. They are buffered, acid- and lignin-free, 80 lb weight papers. Some suppliers also offer colored endpapers in black, red, gray, and other shades. Don't think that these are your only choices, however. Most art paper is the right weight and is also acid-free. It only requires that you cut and fold it. You can also be creative, if you wish, and use marbled or other decorative papers, the only consideration being their weight and that they are acid-free (which most art papers manufactured today are).
When folding the papers in half, you will want to fold along the grain, so that the grain will run from head to tail in the book. This will prevent warping, allow for easy opening and flexibility, and avoid buckling. You can determine a paper's grain in several ways. Mold-made or laid paper can be held up to the light, exposing chain lines. The grain will run parallel to those lines. Another way to determine grain is to hold the paper and bend it gently. If you encounter resistance, you are going against the grain; very little resistance and you are with the grain. If you're still unsure, you can always resort to making two small tears at one edge, one horizontal and one vertical. The tear that is straightest will be with the grain.
If the old endleaves are wrinkled or buckling, remove as much of them as possible without damaging the boards. This may be accomplished by gently tearing them off. I just rip out what can be taken out and leave the rest. It's not entirely necessary to remove the old ends unless they're warped, bubbled, have heavy marks on them - or anything that would show through the new ends.
Once you have your endpapers folded, measure the text block from top to bottom using scrap paper. This will be the most accurate way of determining size. Cut the endpaper to the exact height of the text block and at least 1/2" wider than the text block. Once cut, fit it against the book to confirm that it was done correctly before doing any gluing.
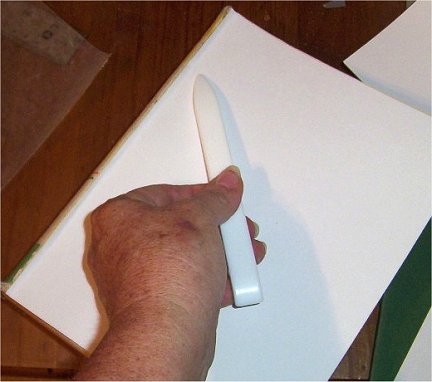
Place a ruler approximately 1/8" from the folded edge. Using a bone folder, turn up the edge. This will allow the endleaf to fit against the inner lip of the text block. Do this for both endleaves.
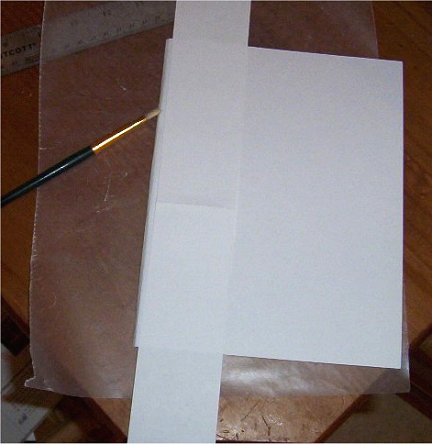
Turn one endleaf over and lay it on top of wax paper to protect the surface on which you're working. Place scrap paper against the fold, approximately 1/4" from the edge and hold firmly. Apply PVA glue, working from the scrap paper out to the edge to avoid having glue seep under the scrap paper and get onto the endleaf. Immediately fit the endleaf against the lip of the text block, making sure the top and bottom align with the text block. Gently bone against the glued edge. Flip the book over and repeat on the other side.
As an optional step, you can apply a thin strip of rice paper along each seam where the endleaf meets the text block (front and back) for extra holding power. Do not make the strip too wide or it will keep the book from opening properly.
Allow the book to dry for about 30 minutes before continuing.
Our next step will be to recase the book. Fit the text block into the cover. First, make sure that both the cover and the text block are right side up! Then check that all edges line up properly and that the text block's edges are all equal distance from the cover's edges. Basically, you want to be satisfied that the book looks correctly reunited with its case.
Carefully lay the book down on the table, taking care not to change the alignment, which can be surprisingly easy to do. Open the cover. Place wax paper under just the endleaf (not the endleaf and flyleaf together).
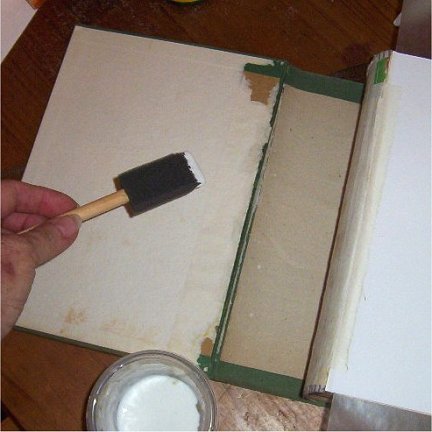
I like using a foam brush because of its sharp edges, its ability to hold a lot of glue, and the fact that I can get one in a good size for gluing large areas. (Plus, they're cheap!) Apply glue to the inside cover, taking care not to get glue on the very edge. If the inside cover has any old endpaper remaining, you can use that as a gluing guide.
Lift the cover, fit it into the hinge area and gently drop it onto the endleaf. Press down on the cover to make sure it has adhered smoothly. Immediately open the cover slightly to check on the endleaf. Bone gently if there are any bubbles or wrinkles, paying special attention to the hinge area. It is important not to open the cover too far because the paper is wet and it will stretch and no longer fit. Close the cover and bone in the outer joint. Then flip the book over and repeat these steps for the other cover.
Place knitting needles (size 3 or 4) into the joints, put a board on top of the book, and then a weight (a covered brick will do nicely) on top of the board. Leave the book to dry about 30 minutes before handling.
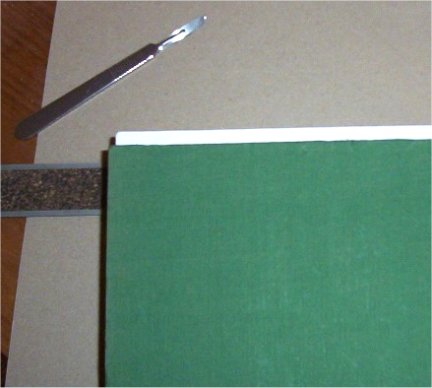
Your final step will be to cut the excess endleaf paper that extends past the cover. You will work on the side of the book closest to your work surface. Place a ruler between the two endleaves and the text block, extending only a fraction of an inch past the text block. Press down on the book and, using a sharp cutting instrument (scalpel or small box cutter), cut off the excess paper along the ruler's edge. Make two or three light runs rather than one heavy one to avoid tearing the paper.
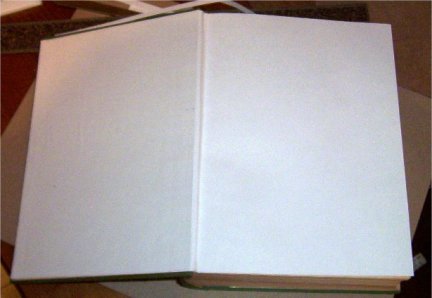
Flip the book over and do the same for the other side. Your book is now beautifully recased. If you are selling it, you should of course disclose that it has been recased using the original boards.
Glossary
Case: Not to be confused with a slipcase, the case is "a book cover, usually made by machine,
consisting of two boards, a paper hollow, and a binding material"
(Glaister, Geoffrey. The Encyclopedia of the Book. Oak Knoll: 1996)
Bone: Used by booksellers as a verb, meaning to run a bone folder along a surface.
Joint: The place where the outer spine meets the boards: "The use of joints for the exterior,
hinges for the interior, junctions of the spine of a volume with its sides is to be encouraged, as
a convenient distinction." (Carter, John. The ABC for Book Collectors. Knopf: 1972)


 If you liked this article, Digg it!