|

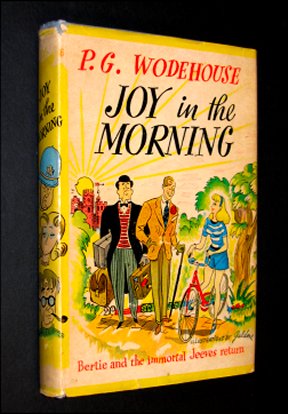
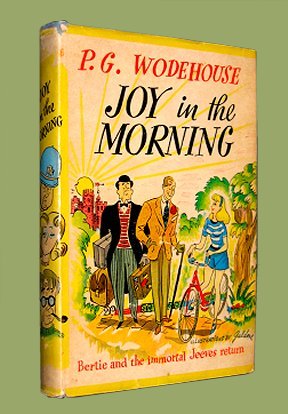
IV: Image EditingWhen I first starting taking pictures of books, I approached it, naively, inside out - trying to get everything right with the book before moving to the camera and, later, to the image editor - instead of outside in. For example, if I wanted the book to be upright at a certain angle in the final picture, why, that's the position I put it in before I took the picture. If this required the use of a stand (or some other device), I used a stand. If the lighting wasn't right - well, you get the idea. My intention, in fact, was to set things up so expertly that the picture I took with the camera was the picture I used in my auction, leaving editing out of it entirely. This approach isn't necessarily a bad idea when you're taking pictures of your kid standing next to Pluto at the Magic Kingdom. Certain things have to be posed. If you're taking pictures of books, however, it's a giant waste of time, and the results are often disappointing. Definitely, a certain amount of preparation is required at the book end of things no matter how you go about this, but it's far easier and more effective to start with what can be done in the image editor, then, with this in mind, move to the book. In my example, knowing that you can readily rotate a picture 90 degrees in an image editor enables you to simply place the book flat on a table. Not only is this easier than attempting to balance a book in a stand, but also, gravity becomes your friend. Whereas a book might lean or fall partially open if stood upright; on a table it lies perfectly square. Similarly, taking a picture of a book's interior on a stand requires that the pages be clipped or otherwise held in place. On the table, more often than not you can simply open the book and snap. This applies to many other things as well - lighting, color, etc. Image editors are powerful tools, and while it takes some time to learn how to use one properly, making an investment in learning can repay itself hugely. Good pictures will almost always add value to your books; sometimes they can make or break a sale. Image editors often come bundled with computers, printers or scanners, but frequently these are light versions of the full version or severely limited in features. Adobe Photoshop is the industry standard, and a powerful tool indeed. It's also expensive. I use Paint Shop Pro because it's reasonably priced, relatively easy to learn, and has most of the features Adobe does. It's also available on a free trial. There are other capable editors as well, but the purpose of this article isn't to get into the technical detail of which editor is best or even specific techniques to use within a given editor. Instead I'm going to discuss some simple principles that can be applied to any quality image editor, and by "simple" I mean just that. Image editors are notoriously complex tools. You can spend months learning how to use one, hours manipulating a single image into stunning perfection. The idea here, however, is to do something quickly, in a matter of moments, and necessary and sufficient for our purposes. No more. With practice, a quality picture can be produced in a matter of moments. The logical place to begin is to look at what we're trying to achieve in the photographic process. Obviously, we'd like to end up with a picture that will help sell the book, but at the same time it's important to be honest. It's entirely possible to edit a picture so as to make a book look much better than it actually is. Also entirely dishonest. But don't assume that a camera shot of a book is honest either. It may have been taken with honest intent, but the initial result may gravely distort reality, and the outcome is still a lie. It takes a good editor to bring it back. Assuming we've taken a picture that adheres to the principles discussed in Part III of this series and opened it in our image editor, what's next? Here is a picture taken directly from a digital camera.
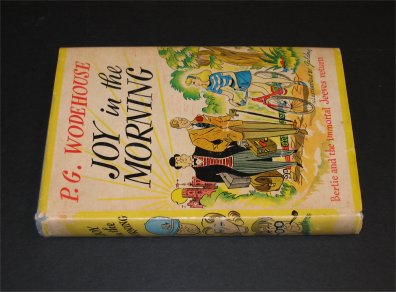
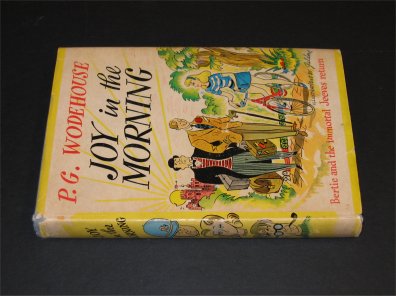
AlignmentThe first order of business is to make the spine of the book square to the world. This one is already close to horizontal but tilted slightly to the left. A quick technique to check alignment is to use the rectangular selection tool and slowly lower the bottom (horizontal) edge of the selection box until it lines up with the bottom edge of the book. If things don't line up exactly, you'll need to rotate the image with the rotate tool. In this case, rotating it .5 degrees to the right brings it into place. It's not always possible to nail this on the first try, but with practice you can get quite good at estimating how far to rotate it.
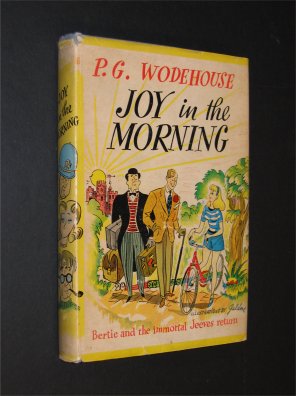
Once you have it lined up horizontally, you can then rotate it 90 degrees to bring it into the standing position.
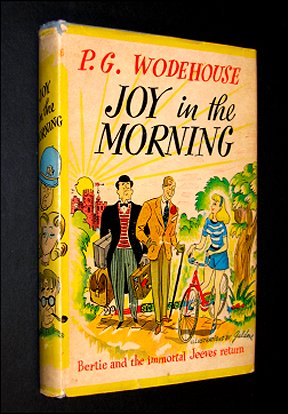
CroppingClearly there's too much background in the picture and too little book. It needs to be cropped. It's important for the book to dominate the picture, but don't crop it so closely that the book looks crowded in its frame - that is, give it some margin. Use the select tool to draw a frame around your book, and delete the excess.

SizeLet's assume that the picture was taken at a resolution of 72 psi - a typical setting. At this resolution a picture width of 4 or 5 inches works well for the auction format. It's big enough to give users a clear look at what's being sold, not so big that it loads slowly or overwhelms the screen. Use the sizing tool to change the width. As long as the "maintain aspect ratio" option is checked, the length will be changed in proportion to the width automatically.
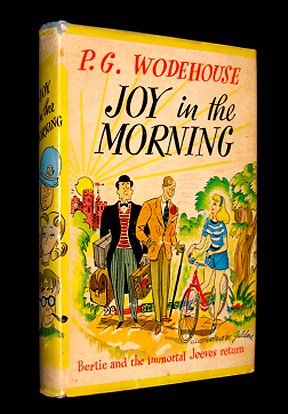
ColorColor here is washed out. The book itself is much more vivid, and we need to move back to the truth. Both Paint Shop Pro and Adobe have auto-enhance saturation tools that will restore color automatically. Experiment with different degrees of saturation, and pick one that will most closely replicate how the book actually looks.
Brightness/ContrastAdjusting brightness and contrast usually helps as well in bringing things back to life, and there are automatic tools for this as well. Again, experiment with different settings until things pop.
FocusDepending on the quality of your camera, this tool may or may not need to be used, but it often improves things for me, though sometimes, if over applied, it can impart a sort of ragged look. I use the tool on every picture I take, no matter how clear it looks initially. If it doesn't improve the appearance, I back out of it.
BackgroundCreating a monochrome background, in my opinion, helps the cause because it drives more attention to the book itself. In this case, the book was photographed on black poster board, but the camera flash has introduced some gray into the background. To produce a uniformly black background, you'll need to select the background with an appropriate tool and use the fill tool to paint it a solid black. Depending on the colors involved, this may involve more than one step - perhaps one or more rectangular selections (and fills), a point to point selection for the angled sides of the book, a magic wand, or even some touch up air brushing. Sometimes deepening the brightness/contrast will take most of the gray out. Whatever tool you use, be careful to preserve the edges of the book. Cropping these off will distort its true condition.
Experiment also with background color. Black often works well and imparts a quiet elegance, but white is simple and clean, and if your auction template also has a white background, the book can appear to be floating in space - a not un-dramatic effect.
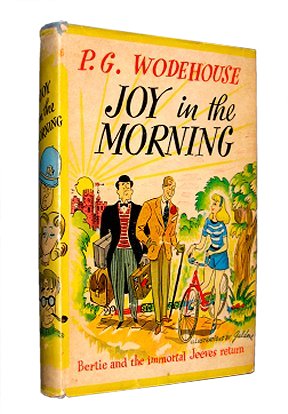
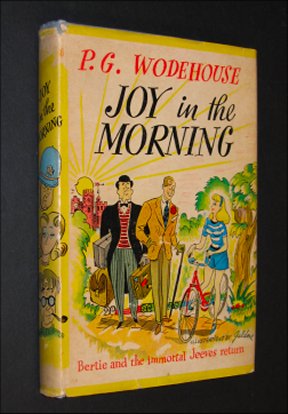
Depending on the color of the book, certain backgrounds may bring out various colors, enhance them. The green background in this picture picks up the green in the dust jacket and complements the yellow elements.
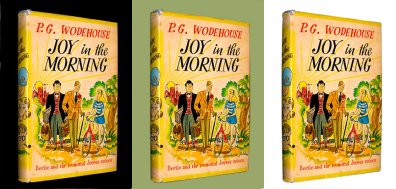
Here's a side by side comparison.
If you're new to image editing, the process of getting from a camera image to a final image may take some time at first. Expect it to. If your first picture takes you an hour or two to get right, don't be frustrated. Once you learn where the tools are, how to use them, and set up a tool bar with icons, the pictures in the examples above can be produced in less than 30 seconds.

< to previous article
Questions or comments?
| Forum
| Store
| Publications
| BookLinks
| BookSearch
| BookTopics
| Archives
| Advertise
| AboutUs
| ContactUs
| Search Site
| Site Map
| Google Site Map
Store - Specials
| BookHunt
| BookShelf
| Gold Edition & BookThink's Quarterly Market Report
| DomainsForSale
| BookThinker newsletter - free
Copyright 2003-2011 by BookThink LLC
|

|